Key Takeaways
- The Meadows Row is John Meadows' gift to anyone who wants a back that looks like it was carved from granite.
- It is an exceptional unilateral back exercise that targets the latissimus dorsi, rhomboids, and traps while reducing spinal stress.
- Dumbbell variations of the Meadows Row offer a unique training stimulus and practical alternatives when landmine attachments aren't available.
- Proper form requires a hinged position with neutral spine, staggered stance, and controlled pulling motion that maximizes back engagement while minimizing.
- SOLE adjustable dumbbells and weight bench provide the perfect tools for executing multiple Meadows Row variations at home.
Master the Meadows Row
What Is a Meadows Row?
Ever looked at someone's back and wondered how they got that thick, three-dimensional look that makes their t-shirt stretch in all the right places? Chances are, they're doing the Meadows Row. Named after the late great bodybuilding legend, John "Mountain Dog" Meadows, this exercise is like finding a hidden cheat code for back development.
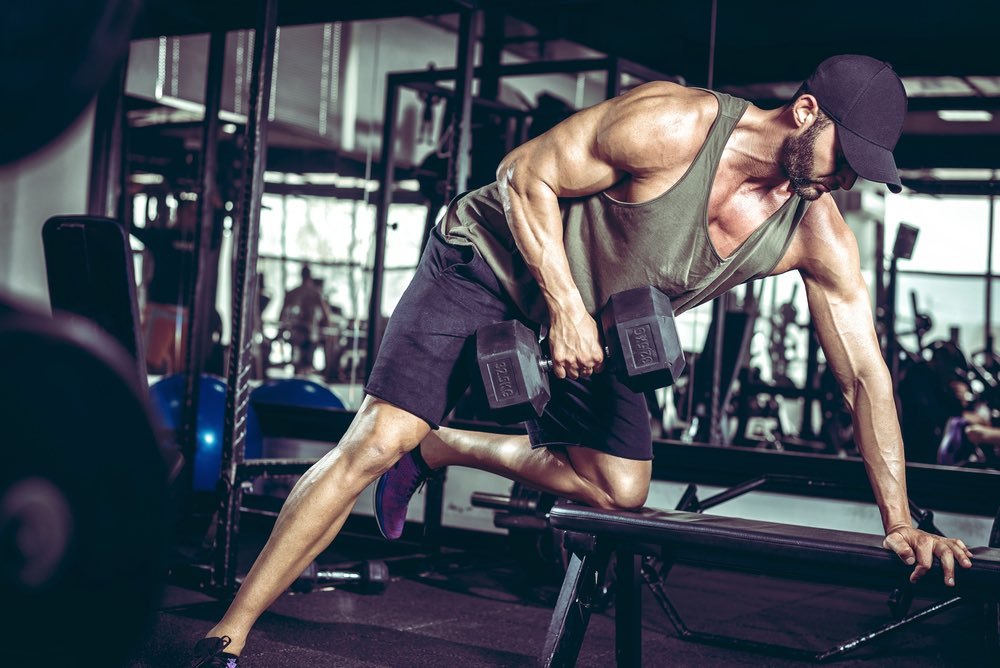
The traditional Meadows Row is a unilateral back exercise performed with a barbell secured in a landmine attachment. You stand perpendicular to the barbell in a staggered stance, hinging at the hips, and row the weighted end of the barbell toward your torso.
What makes it special is the unique angle of pull created by the landmine setup, which allows for exceptional lower lat recruitment while keeping stress off the lower back. Unlike conventional rows where the weight moves straight up and down, the Meadows Row follows an arcing path dictated by the landmine pivot.
When adapted with dumbbells, this movement preserves the core mechanics while offering greater accessibility and some unique training benefits. Dumbbell variations eliminate the need for a landmine setup, which makes them perfect for home gyms or crowded commercial facilities.
John Meadows Legacy
John "Mountain Dog" Meadows left his mark on the fitness world through his innovative training methodologies and exercise variations. As an IFBB Pro bodybuilder and respected coach, Meadows developed the Meadows Row to address specific weaknesses he identified in traditional back training.
His approach emphasized function, feel, and results over conventional wisdom. Before his untimely passing in 2021, Meadows shared countless training insights that continue to influence bodybuilders and strength athletes worldwide. The Meadows Row stands as perhaps his most enduring contribution to exercise science: a movement that embodies his philosophy of finding unique angles to stimulate muscle growth.
Equipment Needed
For the classic Meadows Row, you'll need a barbell, weight plates, and a landmine attachment (or a corner where you can safely secure one end of a barbell).
For the dumbbell variations, the requirements are refreshingly simple: just dumbbells and maybe a bench for certain variations.
|
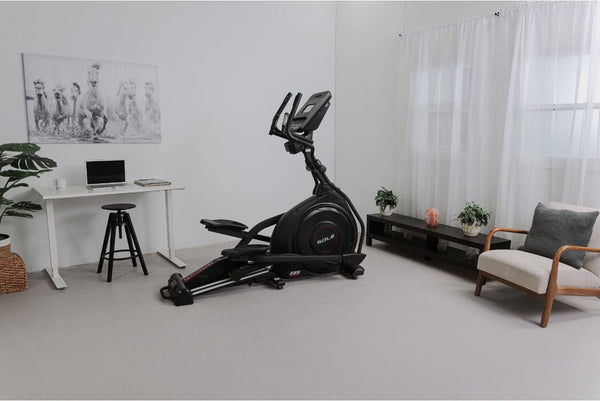
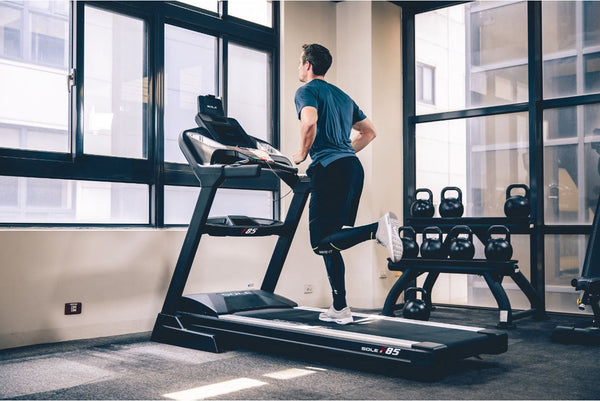
At SOLE, we're proud to offer top-quality exercise equipment designed for home and gym use. Our machines are built to meet the highest standards of durability and performance, making them ideal for fitness enthusiasts at any level. SOLE Products
|
Correct Meadows Row Form
Step-by-Step Setup
Begin by selecting an appropriate weight. For beginners, start lighter to master the form before progressing. Position yourself perpendicular to the barbell (or with a dumbbell in hand).
Adopt a staggered stance with the foot opposite your working arm forward. Hinge at the hips until your torso is nearly parallel to the floor, maintaining a flat back throughout.
Grip the weight with your palm facing down (i.e., a pronated grip) and allow your working arm to hang straight down, feeling a stretch in your lat.
Proper Movement Pattern
Initiate the row by driving your elbow up and back, keeping it close to your body. Focus on pulling with your back muscles rather than your biceps.
At the top position, your elbow should be higher than your back, with the weight near your hip. Squeeze your back muscles intensely at the peak contraction.
Lower the weight under control to the starting position, which allows a full stretch in the lats before beginning the next repetition. The entire movement should follow a smooth, controlled arc rather than a straight line.
Breathing Technique
Inhale deeply during the lowering (eccentric) phase as the weight stretches your lats. Exhale forcefully as you pull the weight up, which helps maintain core tension and back engagement.
For particularly heavy sets, some lifters employ the Valsalva maneuver, or holding your breath briefly during the most challenging portion of the lift. However, this technique requires practice and should be approached with caution by beginners.
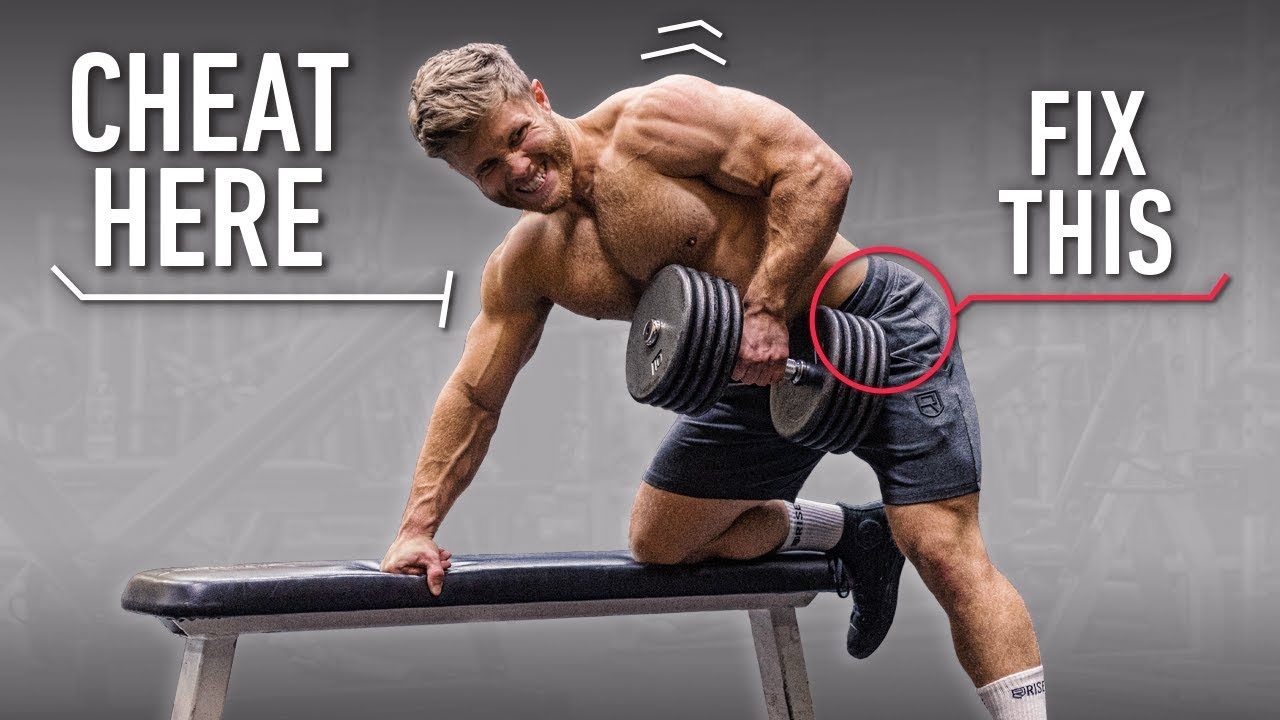
Common Form Mistakes
The most dangerous mistake is letting your lower back round like a scared cat. This shifts stress from your powerful back muscles to your vulnerable spine, which is not a trade you want to make. Always maintain that neutral spine position.
Using momentum turns this precision exercise into a full-body flail fest. If you're rocking back and forth or jerking the weight up, you're missing the point entirely. The weight should move because your back muscles are contracting, not because you're channeling your inner fish out of water.
Pulling primarily with your biceps is like using a Ferrari to tow a trailer: technically possible but missing the point. Your arms are just the cables; your back muscles are the engine.
Muscles Worked
Primary Muscles
Your lats get the VIP treatment, particularly those lower fibers that create the V-taper everyone's after. The rhomboids and middle traps work overtime as you squeeze your shoulder blade at the top of each rep. Your rear delts join the party as secondary movers, contributing to that coveted three-dimensional shoulder look.
What sets the Meadows Row apart is its ability to emphasize those lower lat fibers more than conventional rows. While most exercises hit your lats somewhere in the middle, this one goes after the bottom portion that creates that dramatic taper from your back to your waist.
Secondary Muscles
Your biceps and brachialis work as supporting actors during the pulling motion, but they're not running the show. The erector spinae activates isometrically to maintain your hinged position. Think of them as your body's internal scaffold.
The rotator cuff muscles work behind the scenes to stabilize your shoulder joint, while your forearm flexors get a serious workout from gripping the weight, especially when using a pronated grip without straps.
Stabilizer Engagement
The unilateral nature creates massive demands on your stabilizing muscles. Your obliques and deep core muscles work continuously to prevent your torso from rotating during the asymmetrical pulling motion.
Your glutes and hamstrings activate isometrically to maintain that hip hinge position, while even your front leg's quads engage to support the staggered stance. This comprehensive stabilizer activation makes the Meadows Row a total-body exercise disguised as a back movement.
The anti-rotation component is gold for athletes and anyone who wants functional strength. Most bilateral exercises let you get away with asymmetries, but the Meadows Row forces both sides to work independently.
Benefits of Meadows Rows

Back Thickness
Few exercises build that coveted three-dimensional back thickness like the Meadows Row. The unique pulling angle specifically targets the rhomboids and middle traps, the muscles that create that "thick" appearance when viewed from the side.
The ability to safely load heavy weight allows for significant mechanical tension, which is a primary driver of muscle growth. When performed through a full range of motion with proper contraction, the exercise creates deep muscle fatigue in precisely the areas that separate impressive physiques from average ones.
Many lifters report feeling muscle activation in areas of their back they never knew existed when they first properly execute a Meadows Row. It's like discovering hidden rooms in a house you thought you knew completely.
Unilateral Development
One of the exercise's greatest strengths is addressing the muscular imbalances that plague most lifters. Since each side works independently, your stronger side can't compensate for the weaker one like it does in bilateral exercises.
This forced balance corrects postural issues that arise from side-to-side strength disparities. Over time, this approach leads to more symmetrical development and reduced injury risk. It's like having a personal trainer who refuses to let you cheat.
The unilateral nature also cranks up core engagement, as your midsection works overtime to prevent rotation. This anti-rotation component builds functional core strength that transfers to athletic performance and everyday activities.
Grip Strength
The Meadows Row, especially with a pronated grip, places serious demands on your grip. This makes it an excellent exercise for developing forearm strength alongside back development. Strong grip correlates with improved performance across nearly all pulling exercises.
The dumbbell variations can be particularly effective for grip development, as the handle thickness and freedom of movement create additional stabilization demands.
Joint-Friendly Design
Although it’s intense, the Meadows Row is remarkably kind to your joints compared to many back exercises. The natural arc of movement places less stress on your shoulder joints than straight-line pulling movements.
The staggered stance and hip hinge position distribute load effectively, reducing stress on your knees and lower back. The ability to adjust your body position allows you to find the most comfortable pulling angle for your individual anatomy.
Many lifters who experience shoulder discomfort with traditional rowing movements find they can perform Meadows Rows pain-free.
Dumbbell Variations
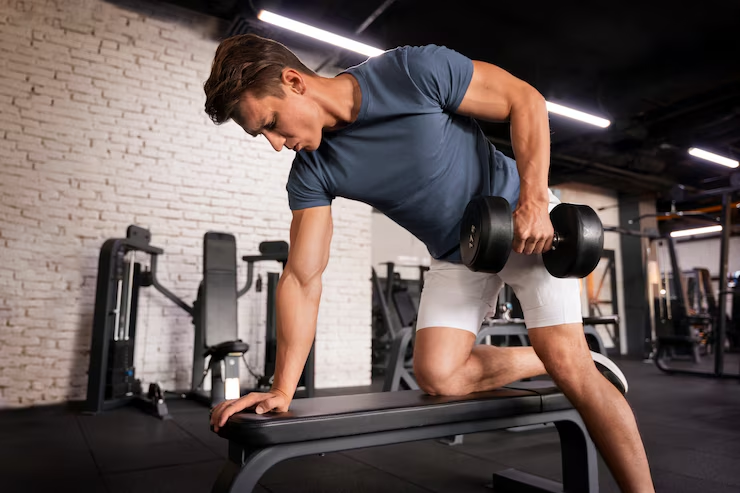
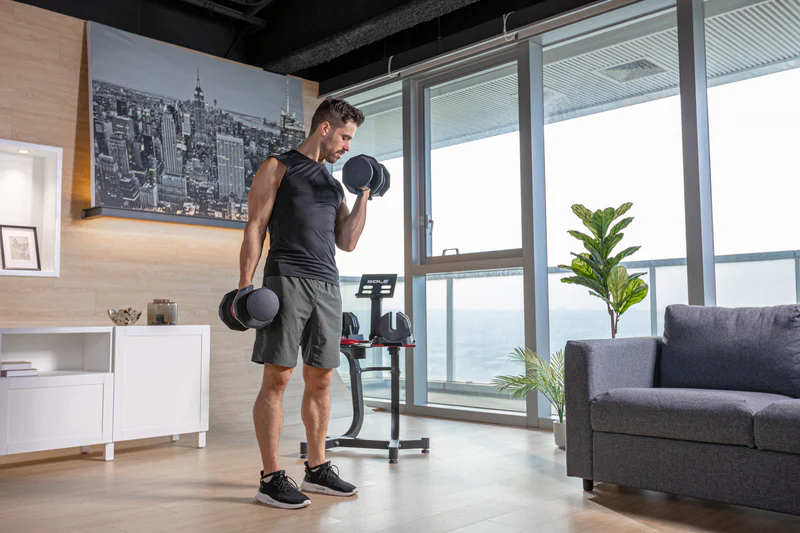
1. Single-Arm Dumbbell Meadows Row
This is the most direct translation of the classic movement. Set up in your standard staggered stance with that hip hinge, but hold a dumbbell instead of wrestling with a barbell setup.
The beauty of this variation is the ability to rotate your wrist slightly throughout the movement, finding the most comfortable and effective pulling angle for your specific anatomy. Your shoulder joint will thank you for this freedom.
Start with a weight that's typically 20–40% lighter than what you'd use for the barbell version. The dumbbell changes the leverage and stability demands, so don't let your ego write checks your form can't cash.
2. Incline Bench Variation
This modification uses an incline bench set to about 30–45 degrees to provide chest support during the row. Position yourself face-down on the bench with a dumbbell hanging toward the floor.
The incline angle creates a slightly different pulling trajectory that can emphasize the upper lats and rhomboids more than the standard version. Experiment with different angles, steeper for upper back emphasis, flatter for lower lat focus.
3. Dead-Stop Dumbbell Meadows Row
This variation incorporates a complete pause at the bottom of each rep, with the dumbbell briefly touching the floor. It's like hitting the reset button between each repetition.
This eliminates momentum and stretch reflex, forcing your muscles to generate maximum force from a dead stop. It's effective for developing explosive power and overcoming sticking points in your pulling strength.
You can use heavier weights with this version since each rep starts from a controlled position. Focus on explosive lifting phases while maintaining full control during the lowering portion.
4. High-Elbow Dumbbell Variation
This technique modification emphasizes your rear delts and upper back by changing the pulling angle. Instead of pulling toward your hip, drive your elbow high and out to the side, like a face pull motion.
This elbow path shifts emphasis to your posterior deltoids, rhomboids, and upper traps. It creates exceptional upper back detail and improves shoulder health and posture, like targeted therapy for your desk-worker posture.
You'll use lighter weights due to the altered leverage, but the payoff in upper back development and shoulder health is substantial.
5. Meadows Row Triple Drop Set
This intensity technique uses three progressively lighter dumbbells to extend a set. Start with your working weight, drop to a lighter weight when you hit failure, then drop again to an even lighter weight.
This extended time under tension creates exceptional metabolic stress and muscle damage, two key factors in muscle growth. It's like giving your muscles a triple espresso shot of growth stimulus.
Use this technique sparingly, once weekly at most as a finisher rather than for every set. When properly executed, it creates a muscle pump that makes you question if your shirt still fits.
Transform Your Back Training with SOLE Premium Equipment
The Meadows Row deserves equipment that matches its effectiveness. SOLE SW180 Adjustable Dumbbells provide the perfect tool for every dumbbell variation discussed. With weights ranging from 5–80 pounds per dumbbell, you have the full spectrum needed, from learning the movement with light weight to challenging your limits with heavy loads.
What sets these dumbbells apart for Meadows Rows is their balanced construction and ergonomic handles. The weight distribution remains consistent regardless of the selected weight, eliminating the wobbling that plagues inferior adjustable systems. This stability matters when you're in that hinged position trying to maintain perfect form.
The SW116 Weight Bench transforms your Meadows Row options by letting you do the incline variations. With 9 backrest positions, you can dial in the exact angle that targets your weak points. The 550-pound weight capacity handles any load you're strong enough to row, while the stable construction prevents wobbling during unilateral movements.
For floor-based variations like the dead-stop Meadows Row, the SOLE Equipment Mat provides essential protection and comfort. Its non-slip surface keeps you stable during the movement while protecting your floors from dropped weights. The cushioning also makes floor contact more comfortable when setting weights down between reps.
The quick-adjust mechanism on the SW155 Dumbbells shines for techniques like drop sets. You can change weights in seconds, maintaining the intensity that makes advanced techniques effective. No fumbling with collars or searching for different dumbbells, just turn the dial and continue your set.
The SOLE+ App includes tutorials and programming suggestions for incorporating Meadows Rows into your routine. You'll learn the subtle technique points that maximize effectiveness while avoiding common errors. It's like having John Meadows' training wisdom available whenever you need it.
Frequently Asked Questions (FAQs)
Is the Meadows Row suitable for beginners?
Yes, beginners can benefit from the Meadows Rows when properly introduced. Start with lightweight dumbbell variations to master the movement pattern before progressing to the barbell version. The incline bench variation is particularly beginner-friendly as it eliminates the need to maintain the hip hinge position.
Can I do Meadows Rows without a landmine attachment?
Absolutely! While the landmine attachment creates the ideal setup, there are several effective alternatives. The simplest is placing one end of a barbell in a corner where walls meet, with a towel to prevent damage to the wall.
How does the Meadows Row compare to traditional barbell rows?
The unilateral nature eliminates strength imbalances between sides and creates greater core engagement. The unique pulling angle better targets the lower lats and middle back compared to conventional rows. The landmine setup reduces lower back stress by allowing a more natural body position and movement arc.
Traditional barbell rows allow heavier total loading and may be better for pure strength development, while Meadows Rows excel for targeted muscle development and those with lower back concerns.
Can Meadows Rows help with lower back pain?
Many lifters with lower back issues find Meadows Rows more comfortable than traditional rowing movements. The staggered stance and customizable pulling angle reduce shear forces on the lumbar spine.
The supported dumbbell variations (particularly the incline bench version) offer even greater spinal protection. However, proper form remains crucial, and those with existing back concerns should start light and progress gradually.
Always consult with healthcare professionals for specific medical conditions, but many find that properly performed unilateral rows actually strengthen the muscles that support spinal health.
What SOLE equipment setup works best for Meadows Row variations?
For the complete Meadows Row experience, you'll want the SW180 Adjustable Dumbbells as your foundation, they're perfect for every variation we've covered. The ability to adjust from 5–80 pounds means you can start light while learning the movement, then progressively overload as you get stronger. The balanced construction is crucial for Meadows Rows since you're in that awkward hinged position where any wobbling throws off your form. Add the SW116 Weight Bench for the incline variations; with 9 positions, you can find the perfect angle if you want to hammer your upper back or really stretch those lower lats.